Apple iOS 7 Beta 5 iPhone 5


Apple iOS 7 Beta 5 iPhone 5 | 2.37 GB
This is a pre-release version of iOS 5 beta 7 (build 11A4449a) for developers is compatible with iPhone 5


The device, updated to this version of iOS beta 7 can not be restored to earlier versions of iOS.


Download:
Code:
http://uploaded.net/file/r287n4ru/7be5iPhone5.part1.rar
http://uploaded.net/file/5wlu8vq1/7be5iPhone5.part2.rar
http://uploaded.net/file/trvjy7ej/7be5iPhone5.part3.rar
or
http://rapidgator.net/file/b2b6f3ee01d1afd8fe39b5a479b12091/7be5iPhone5.part3.rar.html
http://rapidgator.net/file/7202ccecfc700f1d03e585d7829f4e45/7be5iPhone5.part1.rar.html
http://rapidgator.net/file/62a08825537e03e4441d8fd2ac9914c2/7be5iPhone5.part2.rar.html
or
http://www.secureupload.eu/kjlns7zbbeuu/7be5iPhone5.part1.rar
http://www.secureupload.eu/j21ovluvi9cz/7be5iPhone5.part2.rar
http://www.secureupload.eu/j1utklsjitb1/7be5iPhone5.part3.rar

Apple iOS 7 Beta 4 for iPhone


Apple iOS 7 Beta 4 for iPhone | 4.54 GB

This is a pre-release version of iOS 7 beta for iPhone, iPad, and iPod touch. Devices updated to iOS 7 beta can not be restored to earlier versions of iOS.


Download:
Code:
http://rapidgator.net/file/5c72099e7b80e73e4be971f473fe930c/iOS7eta4.part5.rar.html
http://rapidgator.net/file/84940097133392d81eea904b973c0735/iOS7eta4.part3.rar.html
http://rapidgator.net/file/22f97b987499e42b235524a55264983d/iOS7eta4.part6.rar.html
http://rapidgator.net/file/3dcfdc20073c34b09bea96edc8420c43/iOS7eta4.part4.rar.html
http://rapidgator.net/file/ea5914aa1ecf97195a4504a9f8b4bdfa/iOS7eta4.part2.rar.html
http://rapidgator.net/file/887aeab7ea440b81a9a1c9c0d5539ad3/iOS7eta4.part1.rar.html
or
http://dizzcloud.com/dl/1651fga/iOS7eta4.part5.rar
http://dizzcloud.com/dl/1651fgd/iOS7eta4.part4.rar
http://dizzcloud.com/dl/1651ffp/iOS7eta4.part3.rar
http://dizzcloud.com/dl/1651fft/iOS7eta4.part2.rar
http://dizzcloud.com/dl/1651ffs/iOS7eta4.part1.rar
http://dizzcloud.com/dl/1651ffw/iOS7eta4.part6.rar
or
http://www.secureupload.eu/bxbi4aj1obul/iOS7eta4.part1.rar
http://www.secureupload.eu/ret1w1uoos67/iOS7eta4.part2.rar
http://www.secureupload.eu/zcriglwh5bph/iOS7eta4.part3.rar
http://www.secureupload.eu/pz06385r1rlt/iOS7eta4.part4.rar
http://www.secureupload.eu/d0yu974axzgv/iOS7eta4.part5.rar
http://www.secureupload.eu/b1y7mtpdozxe/iOS7eta4.part6.rar

Samsung Galaxy S3 GT-I9300 Stock Firmware Collection

Samsung Galaxy S III GT-I9300 Stock Firmware Collection

Model: GT-I9300
Country: Ireland (Vodafone)
Version: Android 4.3
Changelist: 1902166
Build date: Sat, 26 Oct 2013 03:29:22 +0000
Product Code: VDI
PDA: I9300XXUGMJ9
CSC: I9300VFGGMJ5
MODEM: I9300BUUGMJ3
Download: I9300XXUGMJ9_I9300VFGGMJ5_VDI.zip


Instructions For Flashing Firmware:
- Extract (unzip) the firmware file
- Download Odin3 v3.09 (From here or here)
- Extract Odin .ZIP file
- Open Odin3 v3.09
- Restart phone in download mode (Press and hold Home + Power + Volume down buttons)
- Connect phone and wait until you get a blue sign in Odin
- Add AP_I9300XXUGMJ9_I9300VFGGMJ5_I9300BUUGMJ3_HOME.tar .md5*to AP
- Make sure re-partition is*NOT*ticked
- Click start button, sit back and wait a few minutes.
- If you encounter any issues with the firmware (Any FC, Bootloop etc)
- Boot into recovery mode (Home+power+vol up)
- Choose to wipe/factory reset. (THIS WILL ERASE ALL OF YOUR DATA INCLUDING YOUR INTERNAL SD CARD!)
- Then choose reboot and you should be good to go!


CHANGES AND IMPROVEMENTS IN ANDROID 4.3 UPDATE
- GALAXY GEAR Support
- TRIM Support (Makes the device much faster)
- ANT+ Support
- Core UI elements updated to the ones on the Galaxy S4 (Galaxy S4′s theme all over)
- New Samsung Keyboard
- GPU drivers have been updated (Higher GPU benchmark scores)
- New Lockscreen: Multiple Widgets, improved ripple effect than Android 4.1.2, ability to change clock size and set a personal message
- New Screen modes (From S4): Adapt Display and Professional Photo
- Daydream
- Driving mode
- Actionable notifications
- Move-to-SD-card feature
- New Camera mode : Sound and Shot
- New Additions in Notification Centre
- Completely revamped Settings UI (Tabbed interface – Exactly like the Galaxy S4)
- Implementation of Voice controls (Let’s you control various parts of the phone using voice commands – Galaxy S4 feature)
- New Samsung Apps: Calculator, Clock, Contacts, Gallery, Music
- Full screen Samsung apps
- New S-Voice (from Galaxy S4)

ROM Karbonn A9+/Flare ICS to JB {Tutorial} (Links Posted)

I found the tutorial on Facebook. Took a risk for testing . Modified a bit to suite our needs. Credit goes to original developer.


If procedure not followed properly, it may brick your phone. Go ahead with your own risk.

Requirements:

Win XP or Win 7 (all tools set to Win Xp Sp3 Compatibility & Run as Admin), Battery atleast 60%

Required Files:

Karbonn Drivers: download

Roadkill: Download

EMMC Downloader: Download

QUALFAST: Download

IMEI Writer: Download

JB Root: Download

AP Firmware: Download Part 1 Download Part 2

BP Firmware: Download 

ROM Karbonn A9+/Flare ICS to JB {Tutorial} (Links Posted)

Procedure

(160, 82, 45)"]1.Backup your ICS using Roadkill

Turn off your karbonn A9+ or Flare, then press Volume down and power button at the same time. once you see the “ENTRY QPST DOWNLOAD”, open roadkill and click on Store Image Tab, select the disk with 3.61GB, click browse and select the location where you want your backup to be saved, and click start. Once finish proceed to next step.


[COLOR="rgb(160, 82, 45)"]2. Saving IMEI, MAC ID and Serial Number[/COLOR]

Write your IMEI1, IMEI2, Wi-Fi Mac, and Serial Number (S/N) in a piece of tissue paper. For MAC ID, turn on your Wi-Fi, and go to Settings > About Phone > Status. For IMEI just dial *#0000# in dial pad.

3. Backup NVRAM

1: Run EMMC_DownLoad_V1.2.3.exe ,(Check Download Boot Loader for 1st run)

2: Turn device ON (make sure USB Debugging is enable)

3:Connect phone thru microUSB cable (Note: Make sure there are no other USB Modem or phone connected to your computer except for Karbonn a9+ or Flare)

4: Click BackUp_NV.

5: Wait until back up is successful


[COLOR="rgb(160, 82, 45)"]4. Download BP Firmware [/COLOR]

1: Go to ENTRY QPST DOWNLOAD” Mode (Power + Vol Down)

2: Run EMMC_DownLoad_V1.2.3.exe. Click SELPATH select “BP Firmware” Folder.

3: Connect phone thru a microUSB cable.

4: Check Device Manager for "Qualcomm HS-Usb Diagnostics 9006" Com Port #.

5:Look for "Qualcomm HS-Usb Diagnostics 9006" type the Com port # in EMMC Download Box. Click Download.

6:Wait until download is successful (Usually it takes 6-12sec). Remove battery. (Do not Close EMMC Download. then proceed to next Step )


[COLOR="rgb(160, 82, 45)"]5. Download AP Firmware [/COLOR]

1: Run QUALFAST2.0.5.exe. Click SELPATH, select AP firmware (“Stock JB Rom” Folder), Check Format Card & Userdata

2: Go to Fastboot Mode or Green Screen Mode (Power + Vol Up)

3: Click OK to start download then connect phone via a microUSB cable.

4: Wait until download is successful. Remove battery.


[COLOR="rgb(160, 82, 45)"]6. Restore NVRAM Backup[/COLOR]

1: Run EMMC_DownLoad_V1.2.3.exe.

2: Turn device ON. (make sure USB Debugging is enable)

3: Click Restore_NV. Browse and select bak.qcn file. Connect phone thru microUSB cable.

4: Wait until qcn restore is successful. (your IMEI 2 is Null & Wifi Mac Address is set to default. you need to write it again)


(160, 82, 45)"]7. IMEI & Wi-Fi MAC Address Writing

1: Turn device ON (make sure USB Debugging is enable)

2: Locate your modem com port number (Go to Device Manager > Right-click “Tianyu HS-USB Android Modem 9025” > Properties > Advanced Tab > Advanced Port Settings > COM Port # (Ex. 10))

3: Open Qualcomm_Modem_Tools_V1.1.2.exe and type com port #

4: Write all your backup code, then click Write button. (In my case I have re-entered my IMEI1, IMEI2, S/N (Serial Number), Wi-Fi MAC)

Note: Every after successful entry of IMEI, the phone automatically restarts.


8. Rooting

1: Restart Device. Wait until it boot perfectly.

2: Copy update.zip to internal memory.

3: Reboot to recovery and update from internal sdcard.

4: Reboot

5: Enjoy.

How To Install a custom Rom Karbonn A15 Procedure Here Step By Step 100% Done

Here i am posting How To Install a custom Rom in Karbonn A15
Step By Step And guys its Alrdy Tested By Me
and say Thanks For Orignal Poster

-----------------------------------------------------------------------
How To Install a custom Rom

how to root this device

How To Install Cwm Recovry

Let"s Start
----------------------------------------------------------------------
ROOT the Karbonn A15

1. Enable USB Debugging - Under SETTINGS - DEVELOPER OPTIONS

2. Download Driver and Install it
you can download it from here pcdrivers.zip

3. download "Android Root Unlock" from Android Root Unlock | Free software downloads at SourceForge.net and extract it

and run the batch file ICS_Root_Unlocker.bat
the batch file will reboot your phone a couple of times and will wait with a message "Press Any Key to continue"
IMP NOTE : if you pc is saying "PRESS ANY KEY" note if your phone is on or rebooting....
if it is Rebooting, wait for it to start before pressing a key
5. After a couple of boots the phone will be rooted
6. verify that the Root is complete by observing a "Superuser" shortcut in the application list And its done
------------------------------------------------------------------------
Install Cwm Recovery

1. Download the zip from here CWM5.0.2.8recovery - Download - 4shared
2. Extract the zip in a folder.
3. put ur phone in fastboot mode Use the key Vol Up + Pwr
4. Run CWM Recovery.bat and follow the simple steps

For Enter In cwm recovry Modepress and hold vol up and pwr key
it will show fastboot recovery in green display be patient dont leave the keys until it shows recovery Mode ( Cwm Recovry mode )

--------------------------------------------------------------------------
install Custom Rom
Now You Can Install Custom Rom In Ur Karbonn A15
Installation Instructions:
1 .Download Rom From here ICS_Tweaked_A15_SMD.zip
2. Put ur phone in recovry mode
3. select
install zip from sd card and select ICS_Tweaked_A15_SMD.zip
4.
Wipe Data/Factory Reset
5. Reboot

Done enjoy
If you face any problm pls post here
and dont forget use thanks button if you like my post

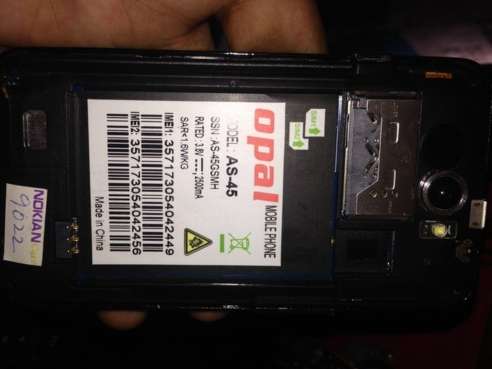
Opal AS-45 Restart on Logo Solved After Flashed

Opal AS-45 Restart on Logo Solved After Flashed


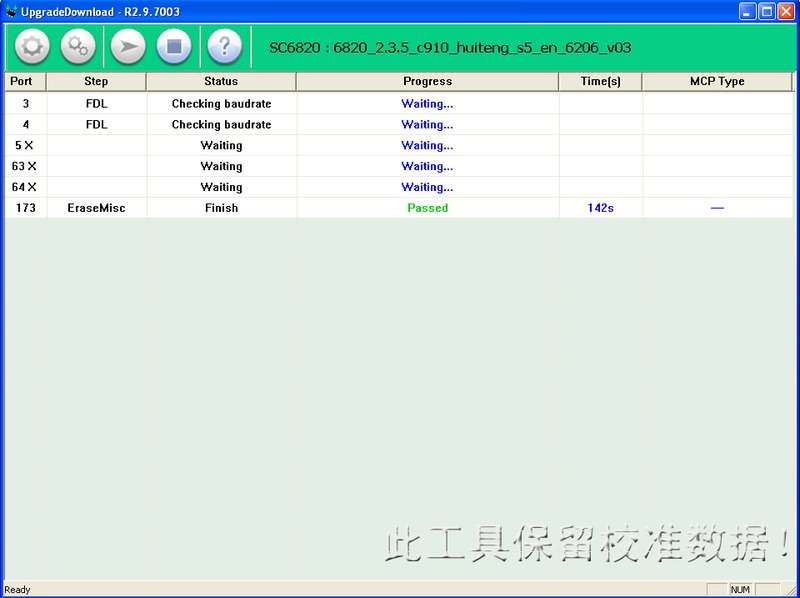
Download Opal AS-45 Android 2.3.5 Tested Rom From Here


Download Flasher From Here

(Tutorial)MTK Android Mobile Root,Rom backup,Reset Gmail,Read Write NV

Today I Am Telling You Videocon A15 MTK Android Mobile Phone Some Solution In One Place

List Of Some Problem Their Solution


1.How To
Root
.
2.How To Reset Gmail (Without Lost Your Data).
3.HOW To
Wipe All Data
.
4.How To Su/Unlock.
5.How TO
Backup System File
.
6.How To Restore System File / Fac Sys.
7.How To Backup Nvram (NV File).
8.How To Restore / Write Nvram (NV File).
9.How To Backup Flash In MTK Android Factory Format Backup.
.................................................. .............................................
Some Important Talks Before Do All This Process

1.Mobile On Condition.
2.USB Debug Mode Enabled.
3.Minimum 2Gb Memory Card Inserted into Phone With 32 BIT Formatted.
4.Now Connect To Pc Port.
5.Open Volcano Box Software.
.................................................. .............................................
Root
1.Go to MTK Tab.
2.Select One-Key Root.
3.Select ADB_ROOT from Option.
4. Untick Auto-Detect Pinouts.
5.Click on Run.
6.Mobile will Detect Phone on ADB.
7.Some Times After Mobile Restart & Root Done.

Root Done Image Bellow

Reset Gmail
1.Go to MTK Tab.
2.Select One-Key Root.
3.Select Reset_Gmail from Option.
4. Untick Auto-Detect Pinouts.
5.Click on Run.
6.Mobile will Detect Phone on ADB.
7.Some Times After Mobile Restart & Done Reset Gmail (Without Lost Data) .
Reset Gmail Done Image Bellow

Wipe All Data
1.Go to MTK Tab.
2.Select One-Key Root.
3.Select Wipe_All from Option.
4. Untick Auto-Detect Pinouts.
5.Click on Run.
6.Mobile will Detect Phone on ADB.
7.Some Times After Mobile Restart & Done Wipe All Data.
 
Wipe All Data Done Image Bellow
 

SU/Unlock
1.Select One-Key Root.
2.Select SU/Unlock from Option.
3. Untick Auto-Detect Pinouts.
4.Click on Run.
5.Mobile will Detect Phone on ADB.
6.Some Times After Mobile SU/Unlock Done .
Su/Unlock Done Image Bellow


Backup System File
1.Select One-Key Root.
2.Select Backup System File from Option.
3. Untick Auto-Detect Pinouts.
4.Click on Run.
5.Now Volcano Box Software ASK Where Save System File.
6.Mobile will Detect Phone on ADB.
7.Some Times After Mobile Save Done Of System File .
Backup System File Image Bellow 1

Backup System FileImage Bellow 2
Restore System File / Fac Sys
1.Select One-Key Root.
2.Select Restore System File Fac Sys from Option.
3. Untick Auto-Detect Pinouts.
4.Click on Run.
5.Now Volcano Box Software ASK Path Of Saved System File.
6.Mobile will Detect Phone on ADB.
7.Some Times After Mobile Reboot & Write Done Of System File .

Restore Systel File Image Bellow 1
Restore Systel File Image Bellow 2
Backup Nvram (NV File)

1.Select One-Key Root.

2.Select Backup Nvram from Option.
3. Untick Auto-Detect Pinouts.
4.Click on Run.
5.Now Volcano Box Software ASK Where Save Nvram File.
6.Mobile will Detect Phone on ADB.
7.Some Times After Mobile Save Done Of Nvram File .
Backup Nvram Image Bellow


Restore / Write Nvram (NV File)
1.Select One-Key Root.
2.Select Write Nvram from Option.
3. Untick Auto-Detect Pinouts.
4.Click on Run.
5.Now Volcano Box Software ASK Path Of Saved Nvram File.
6.Mobile will Detect Phone on ADB.
7.Some Times After Write Done Of Nvram File .
Write Nvram File Done Image Bellow
 
Backup Flash In MTK Android Factory Format Backup
1.Select One-Key Root.
2.Select Backup Flash from Option.
3. Untick Auto-Detect Pinouts.
4.Click on Run.
5.Now Volcano Box Software ASK Where Save Flash File Factory Format File.
6.Mobile will Detect Phone on ADB.
7.Some Times After Flash File Save Done .
Backup Flash In MTK Android Factory Format Backup Image 1

Image 2
 
image 3
 
Now Complete Read Flash In Android Factory Format

How To Root Samsung Galaxy S Advance I9070

FIRST THIS IS FOR PHONES WITH XXLD1 firmware (european) only, on other phones I cannot guarantee this will work!!!

SECOND I AM NOT RESPONSIBLE IF THIS WILL BRICK YOUR PHONE!
Under normal circumstances it won't. If something goes wrong you can still flash original firmware with odin.

THIRD this can only be done in Windows.

Now the procedure

1. Download GT-I9070-root.rar, and extract it somewhere on you local disk.

2. From stuff you just extracted run program Odin3 v1.83.exe

3. Then open Settings in your phone, go to Aplications -> Development and check USB Debugging and Allow mock locations. Both needs to be Checked (Selected).

4. Turn off phone and turn it back on into Download mode, like this press Volume Down + Home button + Power button, wait untill some "strange" screen appers, put in usb cable and choose continue.

5. Now wait until Odin recognize your phone. It can take a while first time, if you have problems search for samsung drivers on the internet,

6. Under PIT file browse for GT-I9070_EUR_XX_8G_20111220_KL6.pit, you have extracted this file before.

7. Under PDA choos rootkernel.tar.md5.

8. Then check what options are checked (Selected), be sure to UNCHECK (remove selction) Re-Partition, Flash Lock, Phone EFS Clear, Phone Bootloader Update! Only Auto Reboot and F.Reset Time should be checked (Selected)

9. When this is set just press Start and wait for phone to reboot.

10. Now repeat steps from 4 to 9, with one exception at step 7 now choose xxld1.tar.md5.

11. Download and install Superuser or SuperSU aplication from market and enjoy the rooted phone! Or you can use a Doomlords rooting tool or Superoneclick, both this tools push the Superuser aplication to /system/app, which might be even better. Just search this tools on XDA.

Voila your phone should now be rooted. I will do my best to improve this method.


Your information were priceless!!


Download

Root Files - GT-I9070-root

SuperOneClick - Download SuperOneClick

Factory ROM Backup for MT65xx via MTK Droid Root & Tools For BackUp & Unbrick

Factory ROM Backup for MT65xx via
MTK Droid Root & Tools
For BackUp & Unbrick


see this thread for driver

How to install ADB USB driver in window 7 see inside
open mtk droid tool


How to install ADB USB driver in window 7 see inside

How to install ADB USB driver in window 7

use this method also in window xp,if any driver not install

Google USB Driver Rev 7 ( ADB driver )

inside three dll file driver

1-WdfCoInstaller01009.dll
2-winusbcoinstaller2.dll
3-WUDFUpdate_01009.dll

link

https://dl-ssl.google.com/android/re...07-windows.zip


All Gsm Solution Headline Animator

Followers