ATF JTAG "BIG BOOT" File Request Inside

Hi,

On this thread you can post RM-XXX of your phone which does not accept any flash file on USB Flashing even after you have performed a JTAG BOOT REPAIR operation on it.

On ATF Software, you are getting error message:

ERROR: Flash Signature Block REJECTED!
This Flash File is NOT COMPATIBLE with this Phone.
ERROR: Flashing Failed!


Since these are very BIG Files and quite time consuming to make, I will only upload specific RM-XXX File if there will be a valid request on this thread.


Check out the Current BIG BOOT Files here:

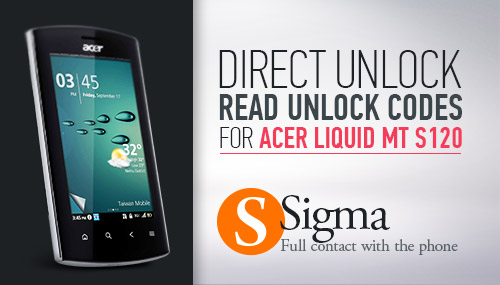
SigmaKey Software v1.30.00 is out! Acer Liquid MT S120 and others are added!


Sigma Software v1.30.00
and Sigma Firmware v1.32 are out!


Get the most out of the servicing software that today got even better!

Qualcomm Platform Update:

1. Added Direct Unlock / Read Unlock Codes features for:

♦ Acer Liquid MT S120 / Liquid Metal

How to connect the smartphone: On the powered OFF phone, press fully Camera and Vol+ simultaneously, and then press Power On button.

2. Updated Fast IMEI Repair database for the following ZTE phones:

♦ T7, F952: added 1 new version for each model


MTK Platform Update:

1. New models added to the list of supported:

♦ Avvio 402 (MT6250)
♦ Doro PhoneEasy 610 (MT6250)
♦ Bess VZ102 (MT6223)
♦ Stone ST-TC533 (MT6235)


Need unlock solution for other new and popular in your area Qualcomm-based smartphones of different brands?
Name them here.

Do you have locked MTK Android smartphone? You are welcome to test unlock solution for it here.


Download Sigma Software v1.30.00

Samsung I9105 imei repair done

Samsung I9105 imei repair don BY SAGAR NADEEM


How to Root I9105 / I9105P Galaxy2 PLUS -
STEP BY STEP rooting manual for GSM-Hosting users

Just follow this simple steps:


1. Step

- Download Samsung USB drivers ----> Click HERE
- Download ODIN 3.04 from ----> Click HERE
- Download CWMtouch-i9105_chotu.tar.md5.zip recovery image from here ------> Click HERE!
for other type fw (Indian) download this recovery image ---> Click HERE!
- Download SuperSu Last version ----> Click HERE


2. Step

- Turn off phone, then switch to download mode:
press together [volume down]+[home button]+[power button] (all at once),
press [volume up] for comfirm download mode.
- Connect usb cable, install drivers.


3. Step

- Run Odin 3.04, ticked 2 option F.reset times+auto reboot,
- Extract CWM-touch_i9082_chotu.tar.zip !Select PDA and browse to where you have extracted CWM-touch_i9105_chotu.tar.md5 or CWM-touch_i9105_Indian_chotu.tar.md5
and select it


4. Step

- Odin should show device under 1 of ID:COM port.(if this not happends repeat from STEP 2)
- Press START.
- Phone should power on after flashing complete.


5. Step - ROOTING:

- Copy Downloaded SUperSU to externel sdcard (NOT INTERNAL ! )
- Power off your phone, after press [Vol up] + [Power] + [Home button] (all at once)
- SelectInstall zip from sdcard --->choose zip from sdcard ---> scroll down and select Fix Recovery.zip and
again choose zip from sdcard and flash UPDATE-SuperSU-v1.05.zip


Updates On Jailbreak For iOS 7, 6.1.4/6.1.3

Hacker winocm, who previously demonstrated a jailbreak of the iPhone 5 on iOS 6.1.4, has tweeted with a minor status update.

"The status of the jailbreak is pretty much: it needs work but its almost there. (For a very small subset of devices.)"


At this point in time its unclear which devices winocm is planning to support; however, it's likely that the iPhone 5 will be one of them. In early September, he tweeted photos of Cydia running on an iOS 6.1.4 iPhone 5. Previously, he also indicated the successful jailbreak of the iPhone 4 so that's another device that could be supported.

Source:iclarified

Samsung i9000 restart problem solution done

File analysis... success
Searching phone... success
Setup connection... success
Get PIT for mapping... success
Firmware update start...
Downloading boot.bin... success
Downloading sbl.bin... success
Downloading param.lfs... success
Downloading boot.bin... success
Downloading sbl.bin... success
Downloading param.lfs... success
Downloading factoryfs.rfs... success
Downloading dbdata.rfs... success
Downloading cache.rfs... success
Downloading zImage... success
Downloading modem.bin... success
Downloading cache.rfs... success
Reset... ok
Attached Thumbnails
Click image for larger version

Name: GT-I9000 at 2013.9.24 13-33-12 with v0357.png
Views: 1
Size: 44.5 KB
ID: 314463  

Sony Xperia C1604 successfully removed google account username and password

Hi,
here is successfully removed google username & password with updating Sony tools services.

If usefull please write comments.........wbr jkniji


Uploaded by jkniji


Uploaded by jkniji


Uploaded by jkniji

Nokia 101 flashing ok but set is dead 100% working solution

states of the phone is dead ...

flashing with atf ,

flashing is ok but one error is show (lcd test failed )


VBATT Powering Down <<<<
VBATT Powering Up >>>>
SET VCCIO Level Done
SET BSI Load Done

Booting Phone...
CPU ID Response: A200341100
CPU Type: XG110 2.1B
Phone Booted at after First attempt...

************************************************** ****
TIME STARTS HERE
************************************************** ****


Sending PBL 19456 bytes...
PBL Successfully Sent...

Sending SBL 65024 bytes...
SBL Successfully Sent...

Flash Chip Manufacturer: STMicroelectronics
Flash Chip Type: M58WR064 64 Mbit (4Mb x 16) NOR
Extended Information: Multiple Bank / Burst / 1.8v

Processing Image File: C:\Program Files\Nokia\Phoenix\Products\RM-769\rm769_007.200

FIRMWARE Image Found...
Number of Sections: 03
FIRMWARE Certificate Block Sent Successfully...
Processing Section 01 of 03
FIRMWARE Erase Block: 0x00000000~0x0001FFFE
Start Erasing...
Erasing Please Wait...
Block Erase Done...
Preparing Data Blocks...
Data Size: 24576 bytes
Data Checksum: F5BE
Uploading Data Blocks to phone...
FIRMWARE Data Blocks uploaded to phone...
Processing Section 02 of 03
FIRMWARE Erase Block: 0x00800000~0x00BFFFFE
Start Erasing...
Erasing Please Wait...
Block Erase Done...
Preparing Data Blocks...
Data Size: 4128768 bytes
Data Checksum: BFB7
Uploading Data Blocks to phone...
FIRMWARE Data Blocks uploaded to phone...
Processing Section 03 of 03
FIRMWARE Erase Block: 0x00C5D000~0x00E5FFFE
Start Erasing...
Erasing Please Wait...
Block Erase Done...
Preparing Data Blocks...
Data Size: 1697536 bytes
Data Checksum: 2B05
Uploading Data Blocks to phone...
FIRMWARE Data Blocks uploaded to phone...
Start Data Verification... (Please wait)
Data Verification Successful...


Processing Image File: C:\Program Files\Nokia\Phoenix\Products\RM-769\rm769_007.20mh

PPM Image Found...
Number of Sections: 01
PPM Certificate Block Sent Successfully...
Processing Section 01 of 01
PPM Erase Block: 0x00100000~0x0061813E
Start Erasing...
Erasing Please Wait...
Block Erase Done...
Preparing Data Blocks...
Data Size: 5341504 bytes
Data Checksum: 47D8
Uploading Data Blocks to phone...
PPM Data Blocks uploaded to phone...
Start Data Verification... (Please wait)
Data Verification Successful...


Processing Image File: C:\Program Files\Nokia\Phoenix\Products\RM-769\rm7690_nai07.20mh_nlt

CONTENT Image Found...
Number of Sections: 01
CONTENT Certificate Block Sent Successfully...
Processing Section 01 of 01
CONTENT Erase Block: 0x00E60000~0x00F49FFE
Start Erasing...
Erasing Please Wait...
Block Erase Done...
Preparing Data Blocks...
Data Size: 958464 bytes
Data Checksum: BB37
Uploading Data Blocks to phone...
CONTENT Data Blocks uploaded to phone...
Start Data Verification... (Please wait)
Data Verification Successful...


Exit Flash Mode Done...
Time Elapse : 00:04:32

************************************************** ****
You must Factory Reset the phone to enable the
ringtones and other customized settings to work
************************************************** ****


Waiting For Phone to go Online...

5, 4, 3, 2, 1...
MCU: V 07.20 30-03-12 RM-769 (c) Nokia
IMEI: 353654055460122
Product Serial Number: 3D65DAFBI
Product Code : 059J2D0
Module Code : 0204874
Basic Production Code: 059P5G1
PPM SW Version : V 07.20 30-03-12 RM-769 (c) Nokia MH
ADSP Version : p+V 07.20\n30-03-12\nRM-769\n(c) NMP\nmh_nlt
MCU SW Version : V 07.20 30-03-12 RM-769 (c) Nokia
HW Version : 3000
UEM Version : 1328
UPP Version : 8850
LCD Version : UNKWN: IDs: 00:00:00
********** SIMLOCK INFO **********
CONFIG_DATA : 0010100000000000
PROFILE_BITS : 0000000000040002
ASIC : 11
PROVIDER : Default Test Operator

Block [1] 1:Open 2:Open 3:Open 4:Open 5:Open
Block [2] 1:Open 2:Open 3:Open 4:Open 5:Open
Block [3] 1:Open 2:Open 3:Open 4:Open 5:Open
Block [4] 1:Open 2:Open 3:Open 4:Open 5:Open
Block [5] 1:Open 2:Open 3:Open 4:Open 5:Open
Block [6] 1:Open 2:Open 3:Open 4:Open 5:Open
Block [7] 1:Open 2:Open 3:Open 4:Open 5:Open
ST_LCD_TEST : FAILED

Phone Cannot Enter Normal Mode if LCD
is Damaged or LCD is not Properly
Connected to the Main PCB


FACTORY SET TO : Full Factory Set
OK
FACTORY SET TO : User Data
OK
FACTORY SET TO : Leave Factory
OK
FACTORY SET TO : Service Center
OK
FACTORY SET TO : Software Upgrade
OK
FACTORY SET TO : Production Tune
OK

apply this jumber.. 100% working.....


phone is on condeshion.....

Samsung 7562 charging solution

All Gsm Solution Headline Animator

Followers